Tagging your documents with Fyler is simple and ensures both accuracy and efficiency. This guide will walk you through the process step by step, so you can tag your filings with ease.
Step 1: Click Create Filing

Step 2: Select the entity for which you're creating a filing. Then, click Continue

Step 3: To tag a 10-Q, select 10-Q and click Create Filing

Step 4: Now, upload your filing! Fyler accepts both HTML and Word, but we strongly recommend uploading an EDGARized HTML document

Step 5: Your document will parse within a minute or so. Once parsing is complete, toggle the validation mode to confirm header rows in your tables

Step 6A: Identify all the header rows in the tables by clicking Y for each header row. They’ll turn green after validation.
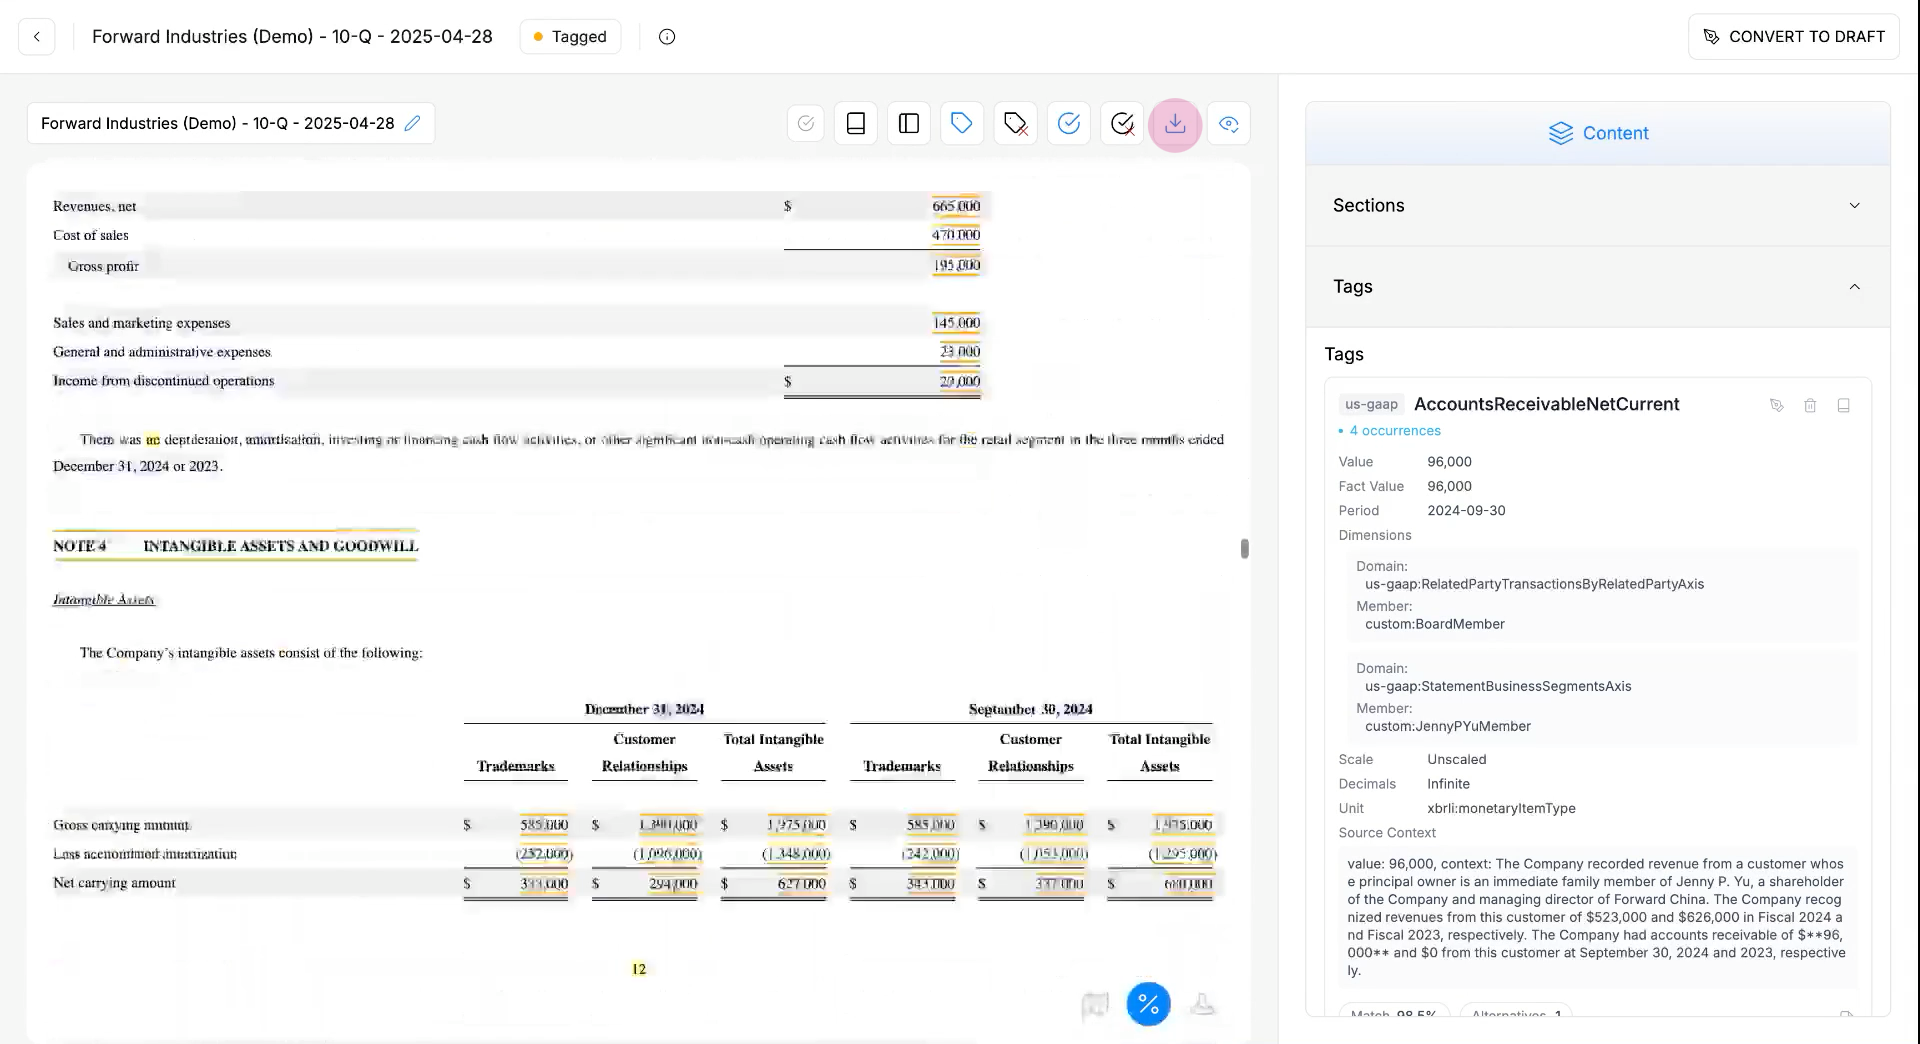
Step 6CB: Remove all header rows that should be ejected by clicking N for each “non-header row” identified as a header row. They should stay yellow. (Image below GIF)
Step 6C: For tables without a header row, confirm them by simply confirming the table. Once all headers are identified, the yellow bar above will turn green and display: "Analysis results validated"


Step 7: Your document is ready to auto-tag now. Simply click auto-tag. It takes a minute to tag 100 elements, so please wait accordingly

Step 8: Your filing should be auto-tagged now and the number of tags, along with the number of tags requiring your review should show up under the tags menu

Step 9: If you need to tag an element yourself, select the element and click Tag. To change a tag, click Edit. Add any required dimensions and click Save. You can set date context, negate the value, etc as you deem necessary

Step 10: When you're ready, click Export to export your filing and upload it to your filing platform
In case you encounter any errors, we have an easy support feature where you can chat with us live at any given moment!
Hope this helps,
Team Fyler
Imagine making 10-K and 10-Q filing faster and easier
🔮 Join the Wishlist!